Keeping your phone and keyboard clean is important not only for appearance but also for hygiene and optimal performance. Since these devices are used daily and often touched with hands, they can accumulate dust, oils, and germs. However, cleaning them requires some care to avoid damage. In this post, we’ll walk you through safe and effective steps to clean your phone and keyboard.
Why Clean Your Phone and Keyboard?
Phones and keyboards collect dirt from daily use—oil from skin, dust from the environment, and sometimes food particles or spills. Regular cleaning helps prevent:
– Buildup of grime that impacts touchscreen sensitivity or keyboard keys
– Spread of germs and bacteria that live on surfaces
– Potential damage from sticky keys or clogged ports
– Maintaining the device’s appearance and longevity
What You’ll Need Before You Start
Gather these common household items. Avoid abrasive or strong chemical cleaners.
– Microfiber cloths (soft, lint-free)
– Cotton swabs or soft brushes (like a clean toothbrush)
– Isopropyl alcohol (at least 70%) or electronic-safe cleaning spray
– Distilled water (for diluting if needed)
– Compressed air (optional, for keyboards)
– Small bowl or spray bottle
Safety Tips Before Cleaning
– Power off your devices and unplug any cables
– Remove cases or covers on your phone
– Don’t spray liquids directly on devices
– Use minimal moisture to avoid damaging electronics
– Avoid harsh chemicals like bleach or window cleaner
—
How to Clean Your Phone Safely
Smartphones have delicate touchscreens and ports that need gentle care.
Step 1: Remove Case and Accessories
Take off any phone cases, screen protectors, or attached accessories. Clean them separately according to their materials.
Step 2: Wipe Down the Surface
– Dampen a microfiber cloth slightly with a mixture of 70% isopropyl alcohol and water (50/50 ratio), or use an electronic-safe cleaning wipe.
– Gently wipe the screen, back, and sides of the phone. Avoid ports, speakers, and buttons as much as possible.
– If you use disinfecting wipes, ensure they do not contain bleach or hydrogen peroxide.
Step 3: Clean Ports and Buttons Carefully
– Use a dry cotton swab or soft brush to remove dust from charging ports, speaker holes, and around buttons.
– Avoid inserting anything sharp or excessive moisture.
Step 4: Dry and Reassemble
– Use a dry part of the microfiber cloth to dry the phone.
– Wait a few minutes before turning the phone back on to ensure any moisture evaporates.
– Replace the case and accessories after cleaning them too.
—
How to Clean Your Keyboard Safely
Keyboards gather dirt, crumbs, and dust that can affect typing and hygiene.
Step 1: Unplug or Turn Off Your Keyboard
If it’s a wired keyboard, unplug it. For wireless keyboards, switch them off.
Step 2: Remove Loose Debris
– Turn the keyboard upside down and gently shake to dislodge loose crumbs.
– Use compressed air to blow out dust between keys. Short bursts are best.
Step 3: Clean the Surface and Keys
– Lightly dampen a microfiber cloth with water or a 50/50 mix of isopropyl alcohol and water.
– Wipe the keys and keyboard surface thoroughly.
– For stubborn dirt or sticky spots, dip a cotton swab in the cleaning solution and clean around the key edges.
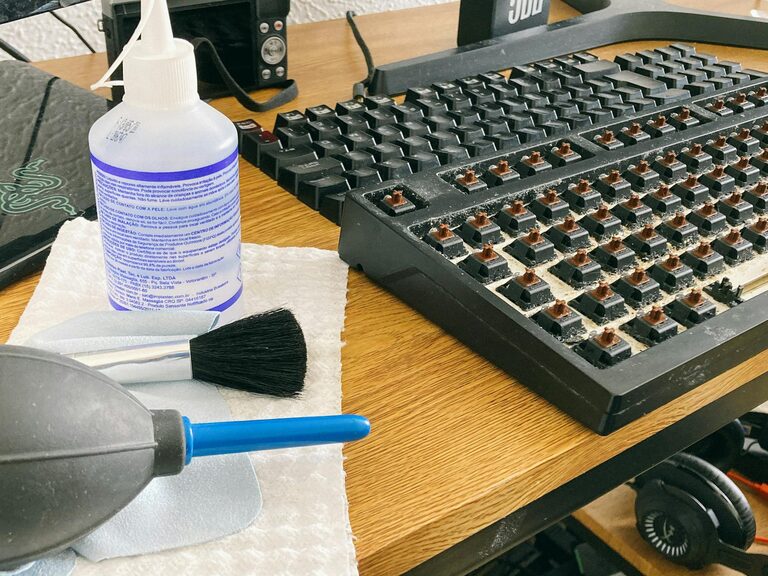
Step 4: Deep Cleaning (Optional)
If your keyboard allows key removal:
– Carefully pop off keys using a keycap puller or small tool.
– Clean the keycaps in warm soapy water, then dry completely.
– Wipe underneath the keys with a damp cloth to remove dust.
– Reattach keys when dry.
Step 5: Dry and Reconnect
– Let everything dry fully before plugging in or turning on the keyboard.
—
Extra Tips for Keeping Devices Clean Daily
– Wash your hands before using devices.
– Avoid eating over your keyboard or phone.
– Regularly wipe down devices at least once a week.
– Store your phone in a clean, dust-free place when not in use.
—
Cleaning your phone and keyboard regularly with these safe methods will help keep your devices looking good, functioning well, and free from germs. With just a few simple steps and materials, it’s easy to maintain your favorite gadgets in top shape!